So you want to learn how to create a Hyperlapse? Well you’ve came to the right place. In this post we’ll explain how to do so. This blog is not going to delve into technical specs, photography theory or contextual references too greatly. To do so would probably spiral into a full thesis. Instead let’s look at what hyper-lapse photography is, how it can be used and how you can create it, but quite briefly, so this post can be more of a stepping off point for you to explore the technique on your own terms.
what is a hyperlapse?
So what the who-wassa-willy is hyper-lapse, anyway? Well, Hyper-lapse is a technique of time-lapse photography where the camera is moved between each exposure. It is distinct from ‘standard’ time-lapse; in which the camera tends to be in a fixed position, and from simple motion time-lapse; where the camera is moved along a short slider or track between exposures for the duration of the image capture.
The effect of using hyper-lapse in video productions can be likened to a tracking video shot and as such can be used as a tool to immerse your viewer in to your scene much more than with a simple motion time-lapse (which is more similar to a less elaborate ‘dolly’ shot).
Because the visual effect of time-lapse inherently ‘accelerates’ real-time (you could show a time-lapse of a block of ice melting over six hours in just six seconds, for example), the addition of moving the camera throughout your image capture can result in an interesting juxtaposition where the viewer is made to feel involved in the scene, by passing through and almost interacting with it, but at a pace which is inhuman and therefore detached and an abstraction from the scene.
Shooting your hyper-lapse
If you had the time and/or money and/or skill you could build elaborate tracks and rigs to mount your time-lapse camera onto. The result should be a stable ‘fly-through’ of your scene by way of hyper-lapse footage. The fact is though that most of the time that just wouldn’t be practical or even possible and it certainly isn’t necessary to create interesting and polished looking hyper-lapses.
Because the method involves moving your camera over significantly larger distances than other time-lapse techniques, large or outdoor areas and subjects lend themselves perfectly. This is definitely something to consider before shooting. At inside Out Time Lapse Productions we document a fair number of construction projects. Our static time-lapse systems are in place for months, sometimes years for the duration of the build. Often though a client will want something extra to ‘show off’ their new building project and hyper-lapse is the ideal tool. We can use cinematic camera movements to take the viewer around, across and through buildings all while abstracted and isolated from real-time thanks to the effect of time-lapse photography. This is coupled with a practical technique essential for a successful hyper-lapse to draw focus on your subject:
To achieve a successful hyper-lapse there are two main steps: shooting the exposures and stabilising/editing the footage. Be warned, both parts are time consuming; the first because it takes time to physically gather your images; the second because you will be waiting for processing and rendering. Ultimately I like to feel the final effect is very rewarding.
Plan your shoot. Before you start capturing images think about what you want the effect of the footage to be, and what path you need to follow while shooting to achieve it. Is it safe? Is it practical? You may find it useful to draw out a line in chalk to follow, or look for other lines like curbs or paving.
We normally use a Canon 6D to get our stills but you can use any camera that gives you a good image. While you can go completely handheld (see what I mean about not needing expensive tracks or motor sliders?) I’d recommend using a monopod for reasons I’ll come on to very shortly. In the absence of mechanical rigs, you are going to be the one to carry and hold the camera and move across your scene. In the interest of making a stable hyper-lapse you will need to hold your camera at more-or-less the same height and degree of roll every time you move, and take a shot. This process can become a war of attrition (some of my hyper-lapses were taken over several hours straight) so I highly recommend you pop your camera on a monopod (or a tripod, but these are heavier and more cumbersome). It will take some of the burden away from supporting your camera and has the advantage of holding the camera at the same height every time you move.
It also has the added advantage of having a point of contact with the ground; My method in moving the same distance between exposures and therefore achieving a smooth hyper-lapse is to place my foot next to the foot of the monopod, then resetting the monopod on the other side of my foot before lining up my shot in the viewfinder, pressing the shutter, and repeating the process. This way the monopod and therefore the camera is moving approximately one foot-width each time.
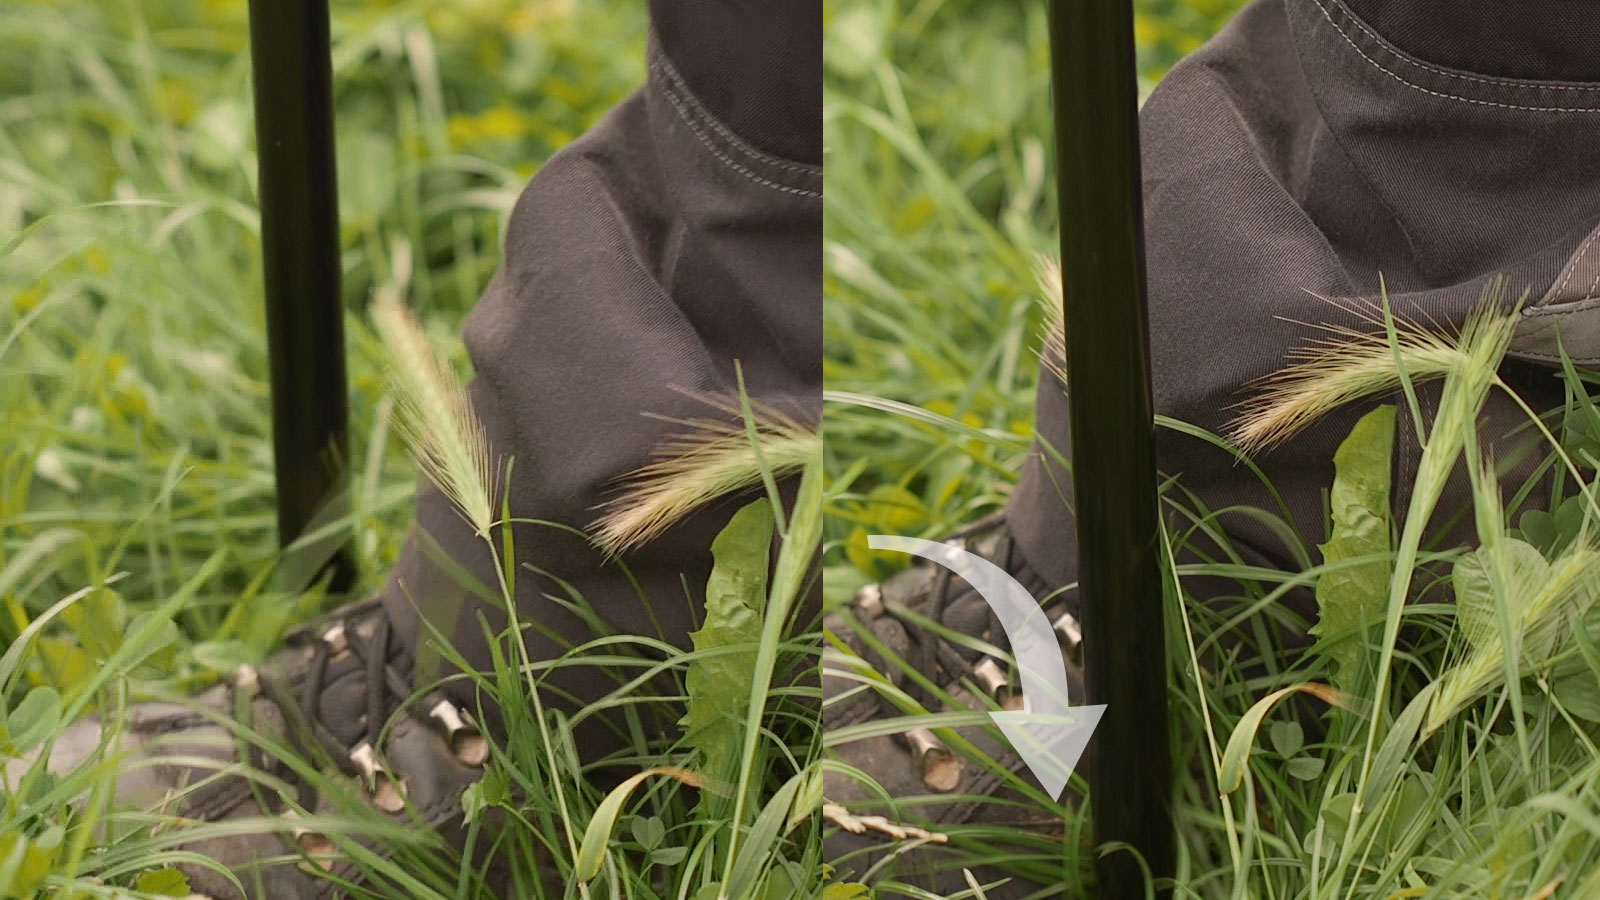 Placing your foot next to your monopod and then using that as a spacing parameter from shot to shot, can help ensure that you keep a consistent distance between each shot.
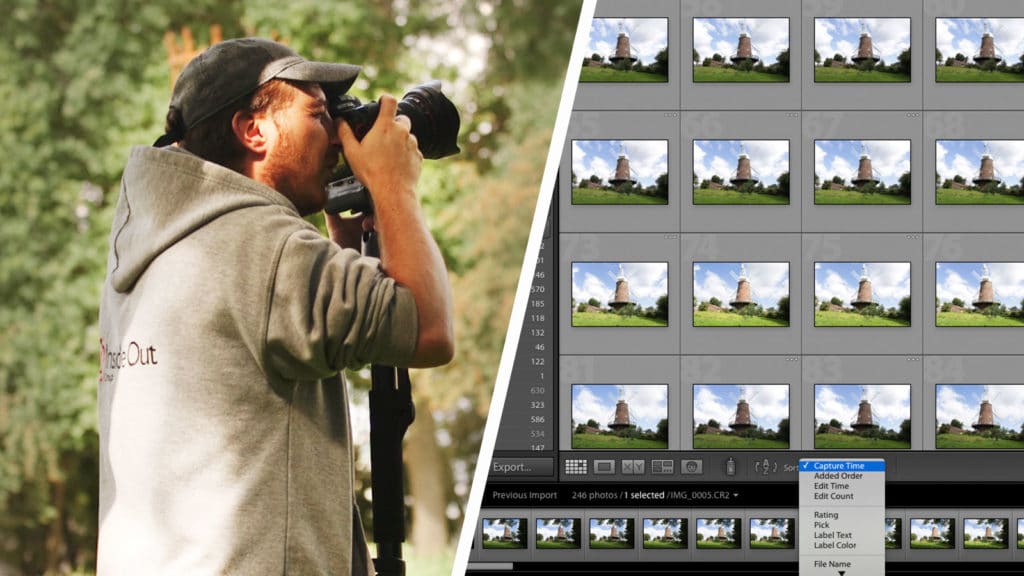
Whether you prefer to use the viewfinder or camera screen, when lining up your shot you should aim to target the same part of your subject in every shot. Pick something that won’t be obscured as you move along your path. It could be the centre of a clock, a window, door or other feature. This really helps you out later when your software is trying to make sense of the hundreds or thousands of individual images it processes and stabilises.
processing your hyperlapse images
Awesome! I have my hyper-lapse images, what’s next Sonny-Jim-m’laddy-old-boy? Assuming you can still use your hands and they haven’t seized into permanent claws from the shooting stage (anyone who has tried hyper-lapses or has played video games for hours at a time will know what I mean), upload your stills to your computer and get ready to edit them into your hyper-lapse video file.
Sometimes I like to import my shots into Adobe Lightroom first, to fix white balance or correct lens distortion etc. but the real work here is done in Adobe After Effects. Import your sequence of images and drag them onto your viewer/timeline (AE is really cool in that all you have to do is drag the first image from a sequence onto your viewer and it will automatically line them up in order for playback). Locate Image Warp Stabilizer in the effects panel and apply it to your clip. Wait. Clever algorithms and/or witchcraft identify points in neighbouring images to use as tracking points and attempt to level out the footage. This is why it’s essential to centre on the same target point with each exposure you capture, to give After Effects’ Image Warp Stabiliser something to make sense of. The results can be a bit hit and miss but you can tweak them by experimenting with the sliders and controls in program.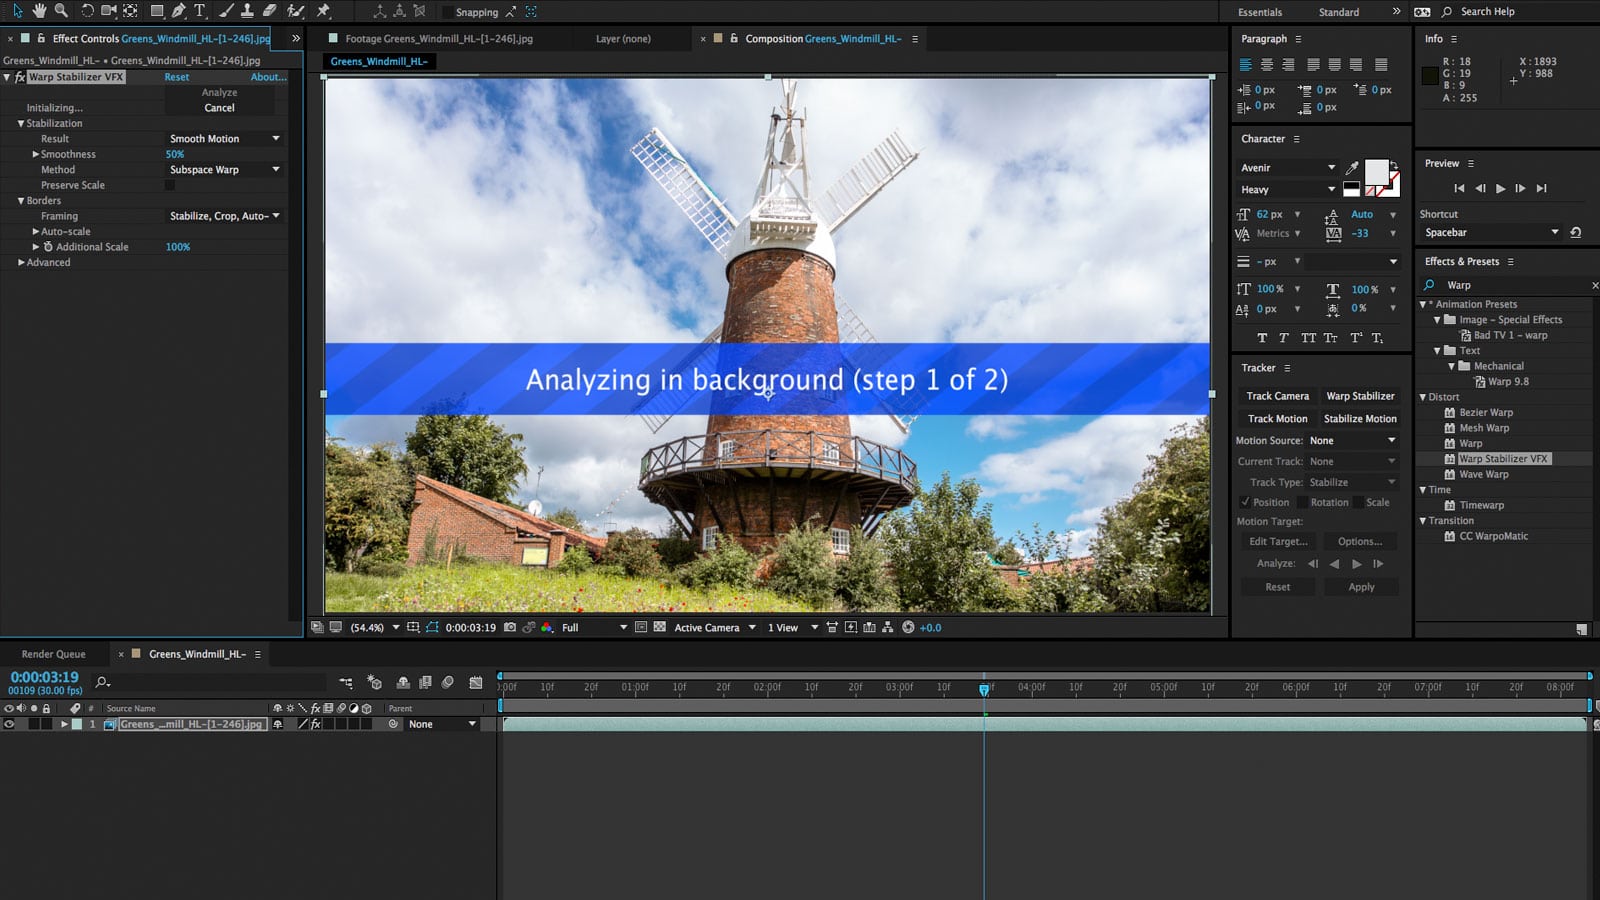 In general, some kind of stabilisation effect is absolutely essential when it comes to processing your hyperlapse video. Not properly stabilising your hyperlapse will mean that it appears very choppy, even if you’ve done your very best to be consistent with your setup when shooting.
As with any time-lapse technique there is a lot of time and effort going in to a relatively short amount of screen time. handled well, however, hyper-lapse can be employed to thrill, amaze and excite your audience.
Want to see more? Then give a little looksy to our short video accompanying this blog.
[contact_cta]